Drivetrain
Transmissions, Primary Belt Drives, Sprockets and Spacers for Harley Davidson® Motorcycles. We only Sell the Best Brands Like BDL Belt Drives and Baker Transmissions.
Front Sprocket
- Smaller (fewer teeth) = more torque, less top speed, and increases engine RPMs
- Larger (more teeth) = more top speed, less torque, and reduces engine RPMs
Rear Sprocket
- Smaller (fewer teeth) = more top speed, less torque, and reduces engine RPMs
- Larger (more teeth) = more torque, less top speed, and increases engine RPMs
Sprocket Adjustment Guide
- Final drive ratio = front sprocket teeth divided by rear sprocket teeth (smaller ratio = more speed, larger ratio = more torque)
- More speed – less torque (decreases RPMs)
- Reduce rear sprocket size
- Increase front sprocket size
- Improves fuel economy due to lower RPMs
- More torque – less top speed (increases RPMs)
- Increase rear sprocket size
- Reduce front sprocket size
- Note: Significant changes may require adjusting chain or belt length
Sprocket Alignment Procedure
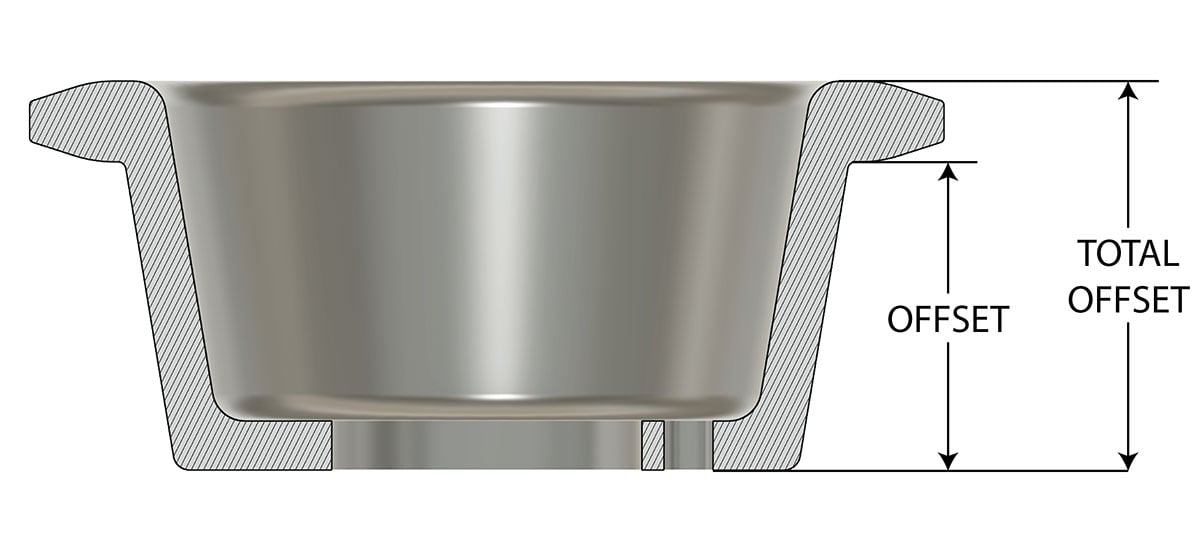
Proper chain or belt alignment is critical when installing a wider rear wheel on a custom motorcycle to ensure smooth operation, prevent wear, and maintain safety. A wider rear wheel often shifts the rear sprocket’s position, requiring an offset transmission (front) sprocket and possibly rear sprocket spacers to align it with the front sprocket. This guide explains how to measure and achieve the correct offset, with the rear wheel centered to the frame’s backbone (true centerline).
Tools Needed
- Straight edge (long, rigid metal ruler or alignment tool)
- Calipers or a precise ruler
- Motorcycle jack or stand
- Wrench set (to remove and adjust sprockets if needed)
- Marker or chalk (optional, for marking)
Steps to Measure and Align Sprocket Offset
- Center the rear wheel to the frame’s backbone
- Place the motorcycle on a jack or stand to lift the rear wheel off the ground.
- Determine the true centerline of the frame by measuring from the backbone (the central spine of the frame, typically above the engine) to the rear axle on both sides. Adjust the axle position until these measurements are equal, accounting for any offset in the rear frame or swingarm to the drive side (usually the left).
- Install the rear sprocket temporarily
- Mount the rear sprocket onto the wheel hub without final tightening.
- Note the rear sprocket’s position relative to the stock setup, considering how the wider wheel affects its alignment with the frame’s centerline.
- Use a straight edge for alignment
- Position a straight edge across the outer face of the rear sprocket, extending it forward to the front sprocket’s location.
- Ensure the straight edge is parallel to the frame’s backbone (true centerline) and rests flat against the rear sprocket’s teeth or face.
- Measure the offset at the front sprocket
- Observe where the straight edge aligns with the stock front sprocket (or its mounting position on the transmission).
- Measure the lateral distance (offset) between the straight edge and the center of the front sprocket’s mounting point using calipers or a ruler. This is the offset required for the new front sprocket.
- Determine spacer or offset needs
- If the rear sprocket is too far inboard (toward the wheel), add rear sprocket spacers between the sprocket and hub to push it outward.
- If the rear sprocket is too far outboard, or after adding spacers, select a front offset sprocket that matches the measured offset from Step 4.
- Example: If the straight edge shows a 0.5-inch offset outward, choose a front sprocket with a 0.5-inch offset in the same direction.
- Test fit and adjust
- Install the offset front sprocket and any rear spacers.
- Realign the straight edge across both sprockets to confirm they are in the same plane (no lateral deviation), parallel to the frame’s backbone.
- Spin the rear wheel to check for chain/belt wobble or misalignment, adjusting spacers or sprocket offset as needed.
- Final installation
- Once aligned, fully tighten the rear sprocket bolts and front sprocket nut to manufacturer torque specs.
- Adjust chain or belt tension according to the motorcycle’s service manual.
Tips
- Chain/belt clearance: Ensure the chain or belt clears the tire, frame, and swingarm after offsetting.
- Frame offset awareness: The rear frame is typically offset to the drive side (left), so always align to the backbone, not the swingarm alone.
- Custom sprockets: If stock offset sprockets don’t match your needs, custom-machined sprockets can be ordered with precise offsets.
- Double-check: Misalignment can cause premature wear or chain failure, so verify alignment from multiple angles.

